
How to Knit the “Henry” Baby Blanket [Free Video Tutorial & Written Pattern!]
***You can purchase an INEXPENSIVE AD-FREE PDF of this pattern on Ravelry HERE or Etsy HERE***
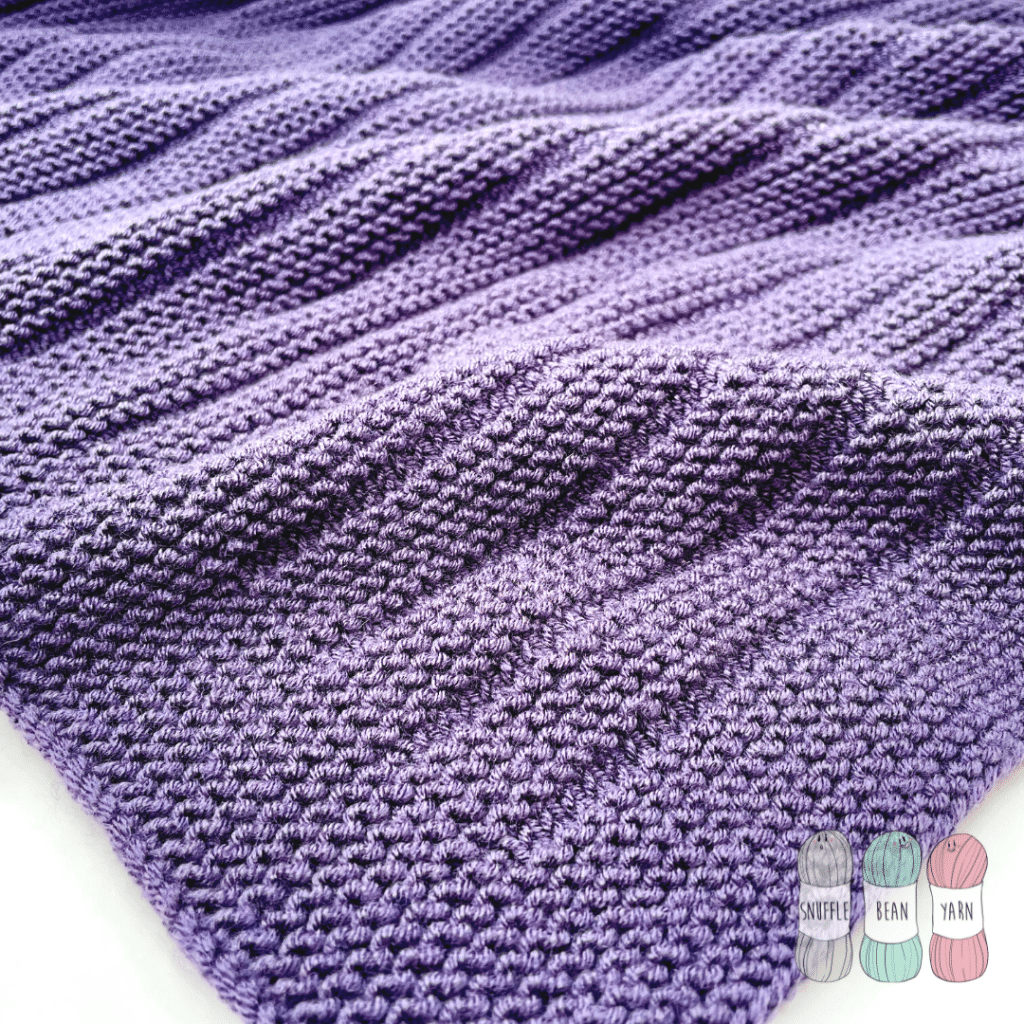
Baby Blankets don’t have to be complicated to be beautiful, even something as a plain garter stitch blanket can look so snuggly and inviting knitted well, and in the right yarn.
Henry is just one small step away from a Garter Stitch blanket. I’ve added in one row of purl stitches which transforms what would be a very plain (but beautiful) blanket, into one that has bags of texture, but remains a super simple quick knit.
yarn and sizing tips & tricks
My instructions produce a Blanket approximately 60cm x 80cm, but the beauty of this blanket is there is NO pattern repeat, you just cast on as many stitches as you need and off you go. Ideal for when you really don’t want to have to sit and work out how many stitches you need to achieve the perfect size.
I’ve chosen to knit this blanket in a rich dark purple instead of the pastel shades you often see baby blankets knitted it. I think the darker colour helps the subtle texture of the purl stitches shine through.
Materials Needed:
- 4mm Circular Needs (to recreate this blanket 80-100cm is a perfect length)
- 400g of DK Yarn – I used Stylecraft Bellissima in Purple Passion
- 2 Stitch Markers
- Scissors & Tapestry Needle for sewing in ends
Written Pattern:
Stitches Used
- k – knit
- p – purl
- sl1pwyf – slip one purlwise with yarn in front.
- Pm – place marker
- Sm – slip marker
Bottom Edge
Foundation Row: Cast on 132 stitches.
Knit 16 rows as follows: K until final stitch, sl1pwyf
Main Pattern Repeat
Setup Row: k9, pm, p across until 9 stitches remain, pm, k8, sl1pwyf.
Repeat Rows:
Row 1-9: k until 1 stitch remains (sm as you come across them), sl1pwyf
Row 10: k9, sm, p across until second marker, sm, k8, sl1pwyf.
Repeat Rows 1-10 (I worked 28 repeats in total) until project is slightly shorter than desired length (to allow for garter edging. Start Edging after completing a “Row 10”.
Top Edge
Knit 16 rows as follows: K until final stitch, sl1pwyf.
Final row (Row 17): Cast off knit wise with right side facing.
Hi! I’m on the way to knit the Henry Blanket ! I’ve bought some fine merino wool from Manifattura Sesia ( called New Jersey)
50 g /82 m ( 1.75 oz/89 y )
5/ 5,5 circular needles
Gauge : 10×10 cm 16 stitches x 22 rows
My question is.. I need to knit a gauge to have a blanket 70cm x 90 cm ? Or do you know how many stitches I need?
My answer is that I probably need the gauge..
Grazie!
Simonetta
I’m awful for not gauge swatching – but the simple answer is yes 🙂
Can you knit Henry in corner to corner style? Thank you.
Not Really, it would have to be completely rethought to work in corner to corner.
I’ve finished my Henry baby blanket! Right now!
I loved how easy was to knit it and how nice is the final result. I ‘m sure the baby boy that’s ready to be born , will use it for a long time…
Now my question is.. the blanket is a present.. could it be better to wash it and blocked it before?
Thanks🇮🇹
Loved watching you knit this! Truly wish I could try this pattern for a large new baby blanket but for the pattern to be in a twenty row repeat or so as I’m not a very experienced knitter.
God bless you for sharing your gift with us and explaining so clearly what to do.
Your patterns with the variety of textures are lovely. Thank you for offering them.
Thank you!
Hi.
I knit the Henry blanket in the Fall of 2023 and loved it. Knitting another one . Started it several days ago. Was just starting Row 16 and realize I had made an error. Had to rip everything out as I just could not work out the error properly. My question is, have you ever made the Henry blanket with less than the 16 knit rows to start the project off? I was wondering if I could do 12 rows then begin the pattern? Thanks for you input.
Hi,
You could definitely work less rows for the border, but then you would find that your side borders will be thicker than your top and bottom borders. But aside from that you have the freedom to adjust as you want 🙂
Thanks
Laurelin