How to Knit the “Emma” Baby Blanket [Free Video Tutorial & Written Pattern!]
***You can purchase an INEXPENSIVE AD-FREE PDF of this pattern on Ravelry HERE or Etsy HERE***
Sometimes it’s not the stitch pattern in a knitting project that pushes you out of your comfort zone. Often it can be something as simple as colour. If you’re familiar with my work, you’ll know that I’m drawn to bright, bold, more modern shades, and that means that historically I’ve shied away from using more traditional pastel shades.
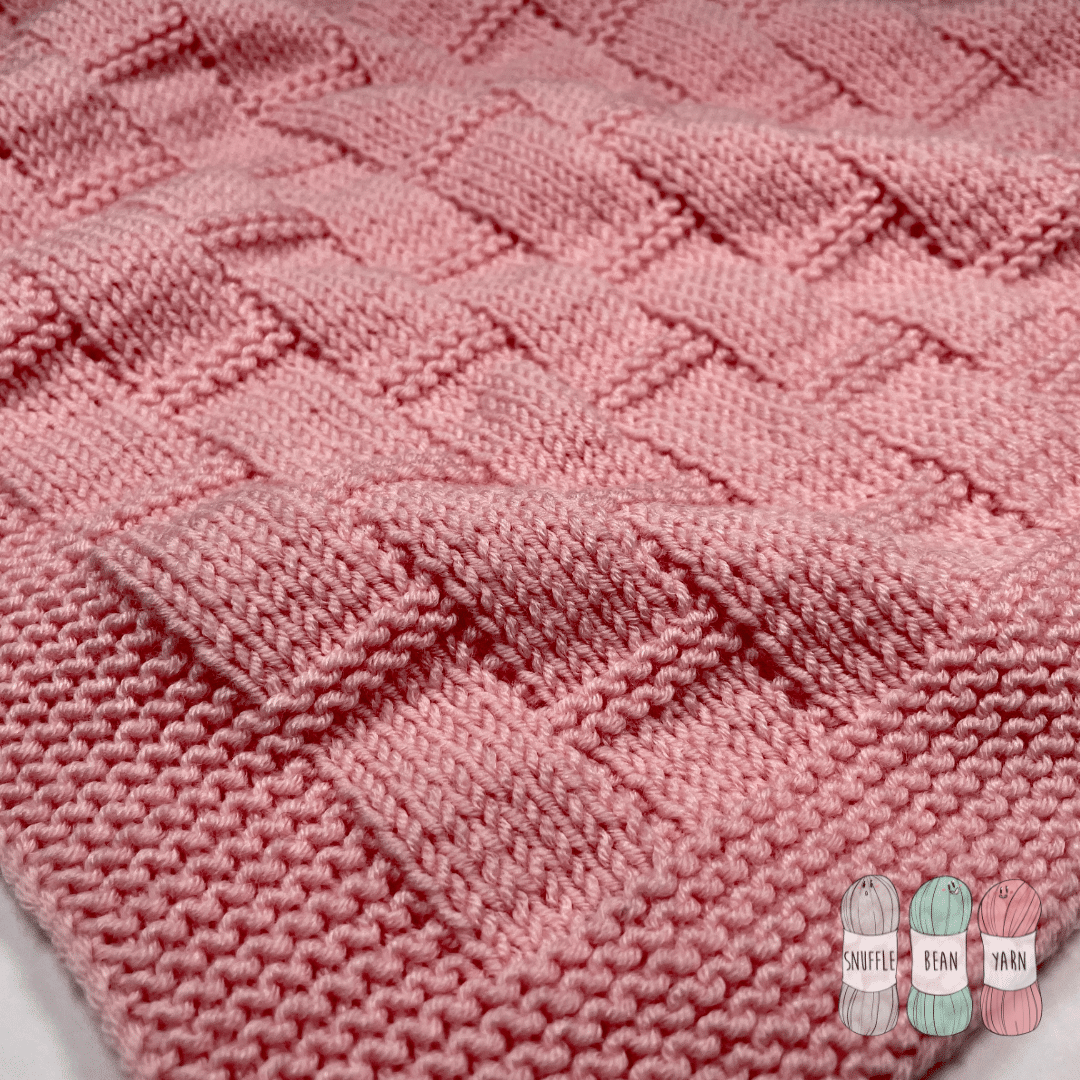
I think it’s good to push yourself out of your comfort zone every once in a while, so when I knitted my sample “Emma” blanket I settled on this lovely soft baby pink to contrast the more angular lines of the pattern repeat. I like to think it’s turned out really well, and I’ve actually really enjoyed working with the softer, gentler colour on this occasion – maybe you’ll even see more pastel blankets from me as we move through the summer!
yarn and sizing tips & tricks
I’ve chosen DK (aka Double Knitting, Light Worsted, 3 Weight) yarn for this project, but don’t let that stop you from knitting it in your own preferred weight of yarn. You will just need to adjust your cast on and number of repeats you work to accommodate the change in weight of yarn.
My instructions produce a baby blanket approximately 60cm x 80cm, but for those of you wanting to adjust this size, it can easily be done using a pattern multiple of 14+6 for the middle panel, and an additional 18 stitches for the garter stitch edging.

Materials Needed
- 4mm Circular Needs (to recreate this blanket 100cm is a perfect length)
- 400g of DK Yarn – I used Stylecraft Bambino in Soft Pink
- Scissors & Tapestry Needle for sewing in ends
- 2 Stitch Markers
written pattern
Stitches Used
- k – knit
- p – purl
- sl1pwyf – slip one purlwise with yarn in front.
- Pm – place marker
- Sm – slip marker
bottom garter border
Foundation Row: Cast on 136 Stitches.
Knit 15 rows as follows: K until final stitch, sl1pwyf
main pattern repeat
Row 1: k9, pm, k until 9 stitches remain, pm, k8, sl1pwyif
Row 2: k9, sm, p6, *k1, p6* repeat from *to* until next marker, sm, k8, sl1pwyif
Row 3: k9, sm, k until 9 stitches remain, sm, k8, sl1pwyif
Row 4: k9, sm, p6, *k1, p6* repeat from *to* until next marker, sm, k8, sl1pwyif
Row 5: k9, sm, k until 9 stitches remain, sm, k8, sl1pwyif
Row 6: k9, sm, p6, *k1, p6* repeat from *to* until next marker, sm, k8, sl1pwyif
Row 7: k9, sm, k until 9 stitches remain, sm, k8, sl1pwyif
Row 8: k9, sm, p6, *k8,p6* repeat from *to* until next marker, sm, k8, sl1pwyif
Row 9: k9, sm, k until 9 stitches remain, sm, k8, sl1pwyif
Row 10: k9, sm, p6, *k8,p6* repeat from *to* until next marker, sm, k8, sl1pwyif
Row 11: k9, sm, k until 9 stitches remain, sm, k8, sl1pwyif
Row 12: k9, sm, p6, *k1, p6* repeat from *to* until next marker, sm, k8, sl1pwyif
Row 13: k9, sm, k until 9 stitches remain, sm, k8, sl1pwyif
Row 14: k9, sm, p6, *k1, p6* repeat from *to* until next marker, sm, k8, sl1pwyif
Row 15: k9, sm, k until 9 stitches remain, sm, k8, sl1pwyif
Row 16: k9, sm, p6, *k1, p6* repeat from *to* until next marker, sm, k8, sl1pwyif
Row 17: k9, sm, k until 9 stitches remain, sm, k8, sl1pwyif
Row 18: k9, sm, k7, p6, *k8,p6* repeat from *to* until 7 stitches before marker, k7, sm, k8, sl1pwyif
Row 19: k9, sm, k until 9 stitches remain, sm, k8, sl1pwyif
Row 20: k9, sm, k7, p6, *k8,p6* repeat from *to* until 7 stitches before marker, k7, sm, k8, sl1pwyif
Repeat Rows 1-20 a total of 11 times (or until project is 10cm shorter than desired length).
Before beginning top edging, work rows 1-17 from the pattern repeat and then move on to top edge instructions.
top garter border
Knit 15 rows as follows: K until final stitch, sl1pwyf.
Final row (Row 16): Cast off knit wise with right side facing.

