How to Knit Diagonal Seed Stitch [Free Video Tutorial & Written Pattern!]
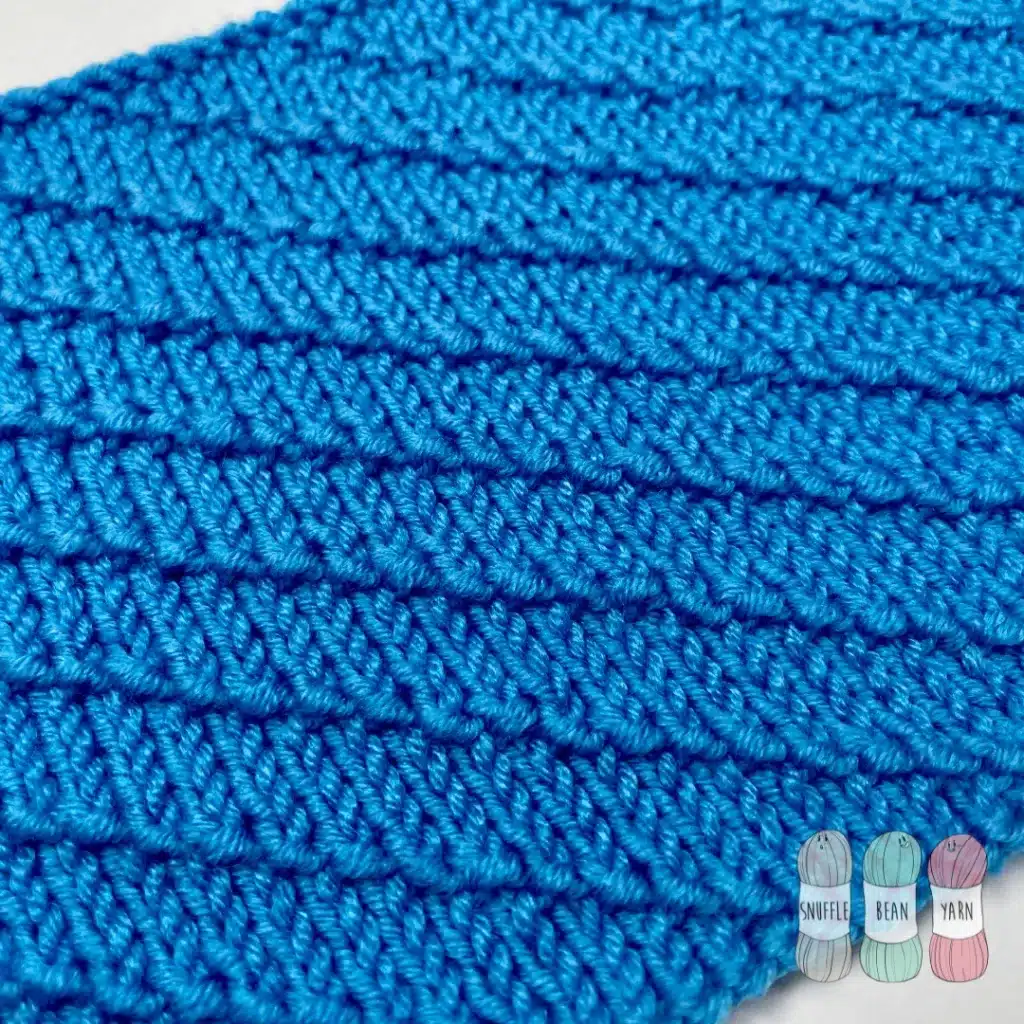
Diagonal Seed Stitch, rather than being a direct variation of traditional Seed Stitch, uses the little purl bumps (or “seeds”) to create diagonal rows of texture on a background of stockinette stitch.
Diagonal Seed Stitch is an easy 6 row repeat that uses only knit and purl stitches to create texture. The simplicity of the stitches used makes it perfect for an adventurous beginner wanting to grow their knitting skills.

As with most stockinette based stitches, diagonal seed stitch is not reversible. The right side of the work has the pattern clearly visible, whereas the wrong side of the work looks very different. That isn’t to say that the reverse is ugly or messy – it just doesn’t have the same defined stitch pattern that the right side does. I’ve attached a photo of the back below to show you what I mean.

As with a lot of stockinette based stitches, the diagonal seed stitch can have a tendancy to curl on the side edges. If you want to avoid this then you might want to add a couple of selvedge stitches at each end which will help to combat the curl.
stitches used
- p – purl
- k – knit
written pattern
Pattern Multiple – Cast on a multiple of 6 using your preferred cast on method (I like to use the Long Tail Method).
Pattern Repeat:
Row 1 (RS): *p1, k5* repeat from *to* until end of row.
Row 2(WS): p4, k1, *p5, k1* repeat from *to* until 1 stitch remains, p1.
Row 3: k2, p1, *k5, p1* repeat from *to* until 3 stitches remain, k3.
Row 4: p2, k1, *p5,k1* repeat from *to* until 3 stitches remain, p3.
Row 5: k4, p1, *k5, p1* repeat from *to* until 1 stitch remains, k1.
Row 6: *k1,p5* repeat from *to* until end of row.
Repeat rows 1-6 until project is desired length.
When you want to cast off, do so on wrong side row. Doing this will keep your pattern symmetrical with a matching row of purl bumps top and bottom.

