
How to Knit Reverse Ridge Stitch [Free Video Tutorial & Written Pattern!]
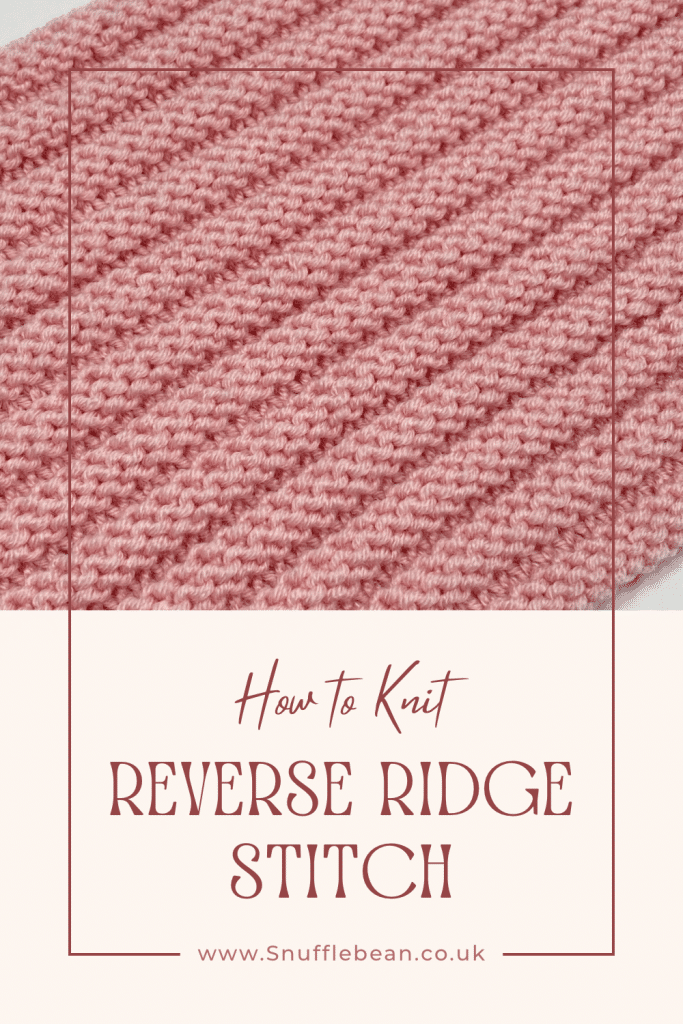
Reverse Ridge Stitch is one of those stitch patterns that offers LOADS of texture and interest by using only basic stitches in a very simple combination.
There’s no counting of stitches needed, no alternation of stitches – just rows worked in certain ways to achieve a gorgeous horizontal pattern that’s fully reversible. In the pattern I’ve marked a right and wrong side just as a guide, but in reality there is no right and wrong side to this pattern.
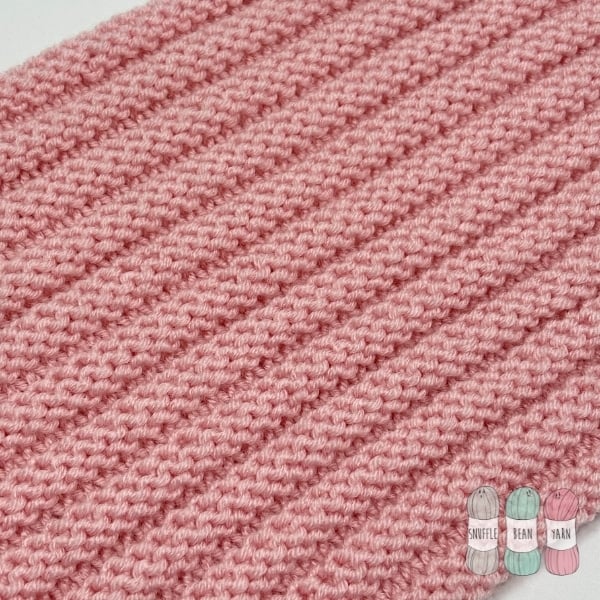
The combination I’m going to show you is a 6 row repeat, but with this pattern you can change the repeat as you like to make your horizontal ridges deeper if you like. The only thing you need to remember is that you must work in combinations of odd numbers.
As an example, this pattern creates ridges three rows deep – to widen you would need to work ridges 5,7,9 (and so on) rows deep. You could even combine different thicknesses to create even more variation in the texture of your work.
pin for later
written pattern
stitches and abbreviations
- k – knit
- p – purl
- RS – Right Side
- WS – Wrong Side
pattern repeat
Foundation Row: Cast on any number of stitches.
Row 1 (RS): k all stitches.
Row 2 (WS): p all stitches.
Row 3: k all stitches.
Row 4: k all stitches.
Row 5: p all stitches.
Row 6: k all stitches.
Repeat Rows 1-6 as many times as you need. When it comes to casting your project off, to acheive symmetry you’ll want to cast off knit wise during a Row 1 Repeat.
![How to Knit the “Toby” Baby Blanket [Free Video Tutorial & Written Pattern!]](https://www.snufflebean.co.uk/wp-content/uploads/2023/11/Toby-Social.jpg)
![How to Knit the “Daisy” Baby Blanket [Free Video Tutorial & Written Pattern!]](https://www.snufflebean.co.uk/wp-content/uploads/2023/10/Daisy-Social.png)
![How to Knit Sailor’s Rib Stitch [Free Video Tutorial & Written Pattern!]](https://www.snufflebean.co.uk/wp-content/uploads/2024/06/Sailors-Rib-front-WordPress.jpg)
Thank you for all the blanket directions. they are fabulous!